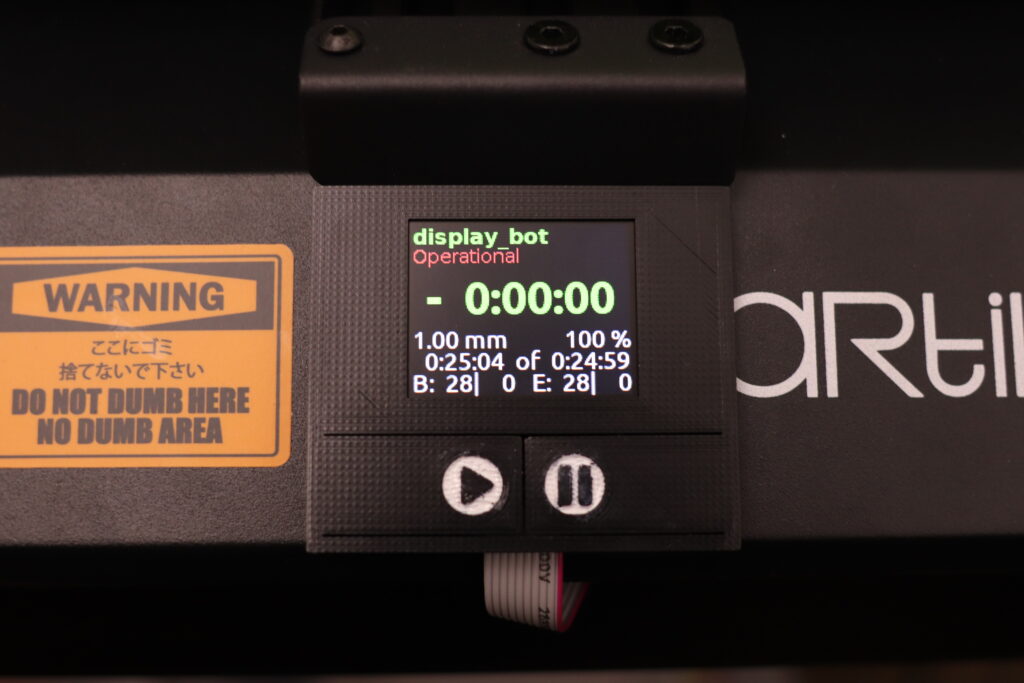
All status information of your running print job in one place and easily readable even from a distance.
The inbuilt display of my 3D FDM printer lacks the ability to show any print information when I directly print through Octoprint. Existing status displays for Octoprint were too small for my taste (and old eyes) and also don’t show all information on one page. So I came up with this solution, which directly connects to the Paspberry Pi running Octoprint. It clearly shows all relevant information on a big 1.8″ display and can easily be read even from a distance and without glases on.
The display shows:
- Job name
- Printer status
- Remaining time
- Current print height and progress (based on height)
- Elapsed time and estimated total print time
- Bed Temperature (current | setpoint) and extruder temperature (current | setpoint)
Below the display are two buttons for starting and halting the print job.
If the print job name in the first line becomes too long, it is wraped over two lines. Numbers use a font with a fixed width for all digits, so that the dipslayed items don’t change their position with each update. Timelapses become much more calm that way. If you don’t care for timelapses, it is still pretty to watch.
The display is controlled by a simple Python script, which connects to Octoprint via it’s websocket interface. This way it is updated by push notifactions which is much less cpu intensive than querying every information through the REST API.
The script also features means to control a bed cool down fan which is enabled after the print finished. Furthermore it watches the bed and tool temperatures and can trigger a printer kill switch which kills the AC power to the printer in case a temperature runaway is detected. By no means I recommend letting your printer unsupervised, but let’s just say: It is one additional step against setting stuff on fire in case you happen to be distracted in just that moment.
How to build
What you need:
- Display: 1.8″ ST7735 128×160
- Buttons: 3x6x2.5mm SMD push button
- Case top: display_top.stl
- Case Bottom: display_bot.stl
- Control script: display.py
- Systemd start script: octodisplay.service
You don’t need this, but in case you want to change the case, here is the FreeCAD file: display.FCStd
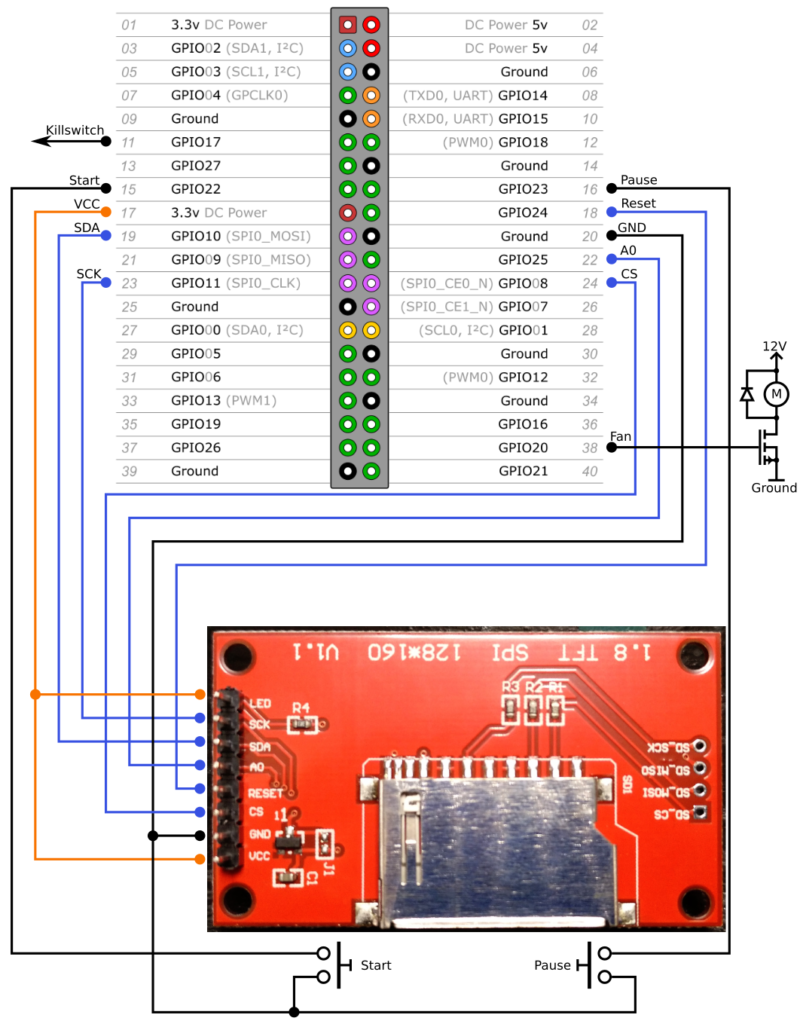
Electrical:
Connect the display as shown below. I also removed the pin header and SD card slot from mine to save some space. The start and pause button are handled by the Octoprint-Enclosure plugin. They can be connected to any free GPIO (Settings: Input + Input Pullup).
Mechanical:
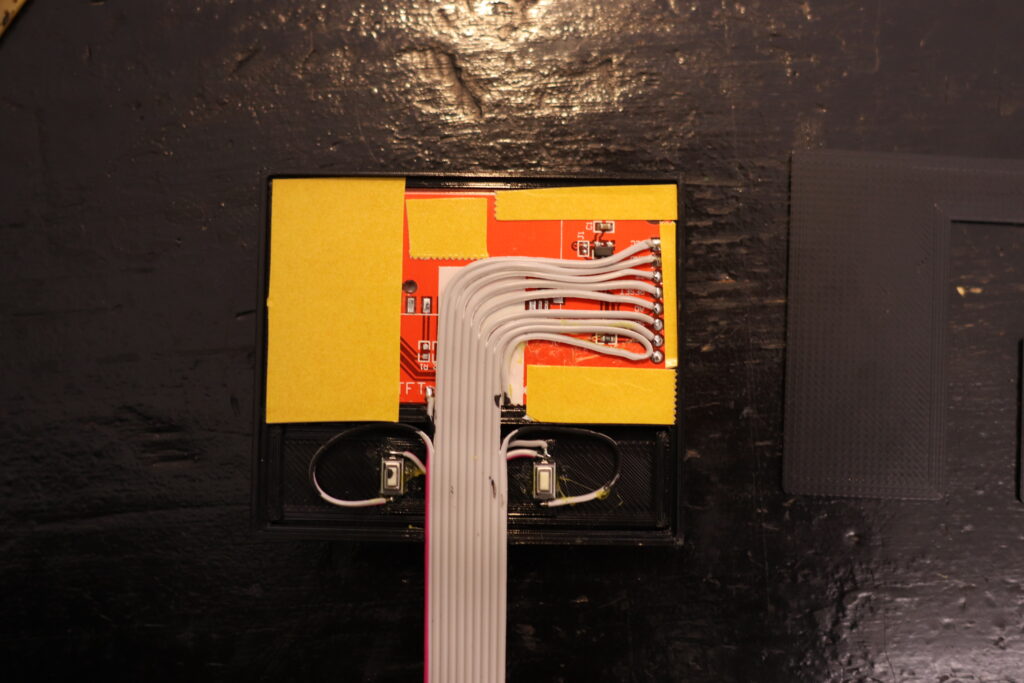
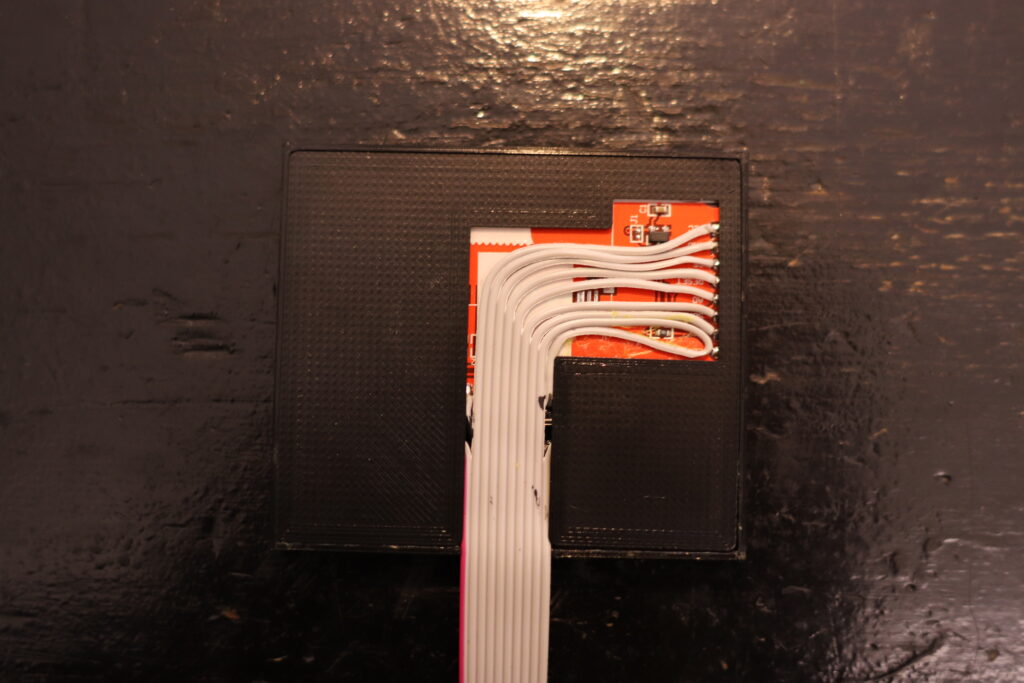
I removed the SD card connector to safe some space. Display and butons secured by some dots of glue. The back part of the case is held in plcae by double sided sticky tape. In the same way the completed display attaches to the printer.
(Hint: The last cable on the display is folded back and not electrically connected. It’s a spare. Don’t be confused 😉 The LED pin of the display is actually connected to VCC on the other side of the display.)
Software:
First, make sure the dependencies are all installed:
sudo apt-get install fonts-dejavu-core fonts-ubuntu python3 python3-websocket
sudo pip3 install --upgrade luma.lcd
sudo pip3 install PIL
Then copy display.py to /home/pi/display.py and octodisplay.service to /etc/systemd/system/octodisplay.service
Next, log into OctoPrint and create a user for the status display with permission „Status“. Enter username and password of the created user into display.py and check if you have to make any other changes in the configuration part at the top of display.py. After that start the service:
sudo systemctl daemon-reload
sudo systemctl enable octodisplay.service
sudo systemctl start octodisplay.service
Cross your fingers, everything should be working now. Good luck.
That’s it!
The final product after finishing the print job for its own backside: